ENERGY AND SPORT: THE BOARD GAMES
The objective of this actitvity is to create our own board game about Energy and Sport.
How are we going to do it?
1. We arrange ourselves in International Workgroups.
2. We meet by videoconference. The activity is presented and workgroups meet for the first time. Icebreaking conversation and first ideas for the activity. The teachers provide a Google Doc template which includes these sections to be filled: rules, pieces, board, cards ... anything required for the game.
Each student has to share the email to the group leader to have acces to the Google Doc file.
3. Each workgroup fills the Google Doc with all their ideas.
4. We meet by videoconference. Each group presents their idea. We vote for them. The most voted idea is chosen.
5. The teachers present the results after voting the proposals. In our case, we chose the two most voted ones.
Then, both winning groups plus the teachers have to test the games using draft versions of them (paper version). The teachers send emails to the students of these groups to coordinate them. The winning groups make the last corrections on the description of the games.
6. We meet by videoconference and the winning groups present the final versions of the games. We share tasks to create the games with the rest of the groups.
The rest of the groups start designing and creating the games. The summary of tasks is listed below.
GAME 2. FINAL DESIGN TASKS:
The PDF files will be printed out and the game will be finalized.
GROUP 1 Tasks 1-2-3 (design of box and cards list, revision of instructions)
GROUP 3 Task 4: 18 cards (design) Cards 1-2-3
GROUP 4 Task 4: 18 cards in cooperation with Group 2 (design) Cards 4-5-6
All files created have to be stored in the in the corresponding drive folder.
GAME 7. FINAL DESIGN TASKS:
The PDF files will be printed out and the game will be finalized.
GROUP 5 Tasks 1-2 (design of box, revision of instructions)
GROUP 6 Task 3-4 (design of board, revision of cards, create more questions)
GROUP 8 Task 5 (design and 3D printing) The printing task is done in La Sénia
All files created have to be stored in the corresponding drive folder.
7. Cooperative preparation of the game. All the groups (except the winning ones) and the teachers arrange the tasks to be done using Google Drive or other tools. They have to design all parts of it before manufacturing (card board printing, pieces 3D printing, box printing .... etc). The pupils and teachers communicate by email to advance their tasks.
Links to the Drive folders that contain the final PDF files sent to the printing company.
Game 2
Game 7
And the 3D Printing files to create the pieces for Game 7 (SVG files used and the STL files prepared with TINKERCAD).
3D Printing Pieces
8. The game is ready to be played with.
9. Congratulations to everybody!!!
Then, both winning groups plus the teachers have to test the games using draft versions of them (paper version). The teachers send emails to the students of these groups to coordinate them. The winning groups make the last corrections on the description of the games.
6. We meet by videoconference and the winning groups present the final versions of the games. We share tasks to create the games with the rest of the groups.
The rest of the groups start designing and creating the games. The summary of tasks is listed below.
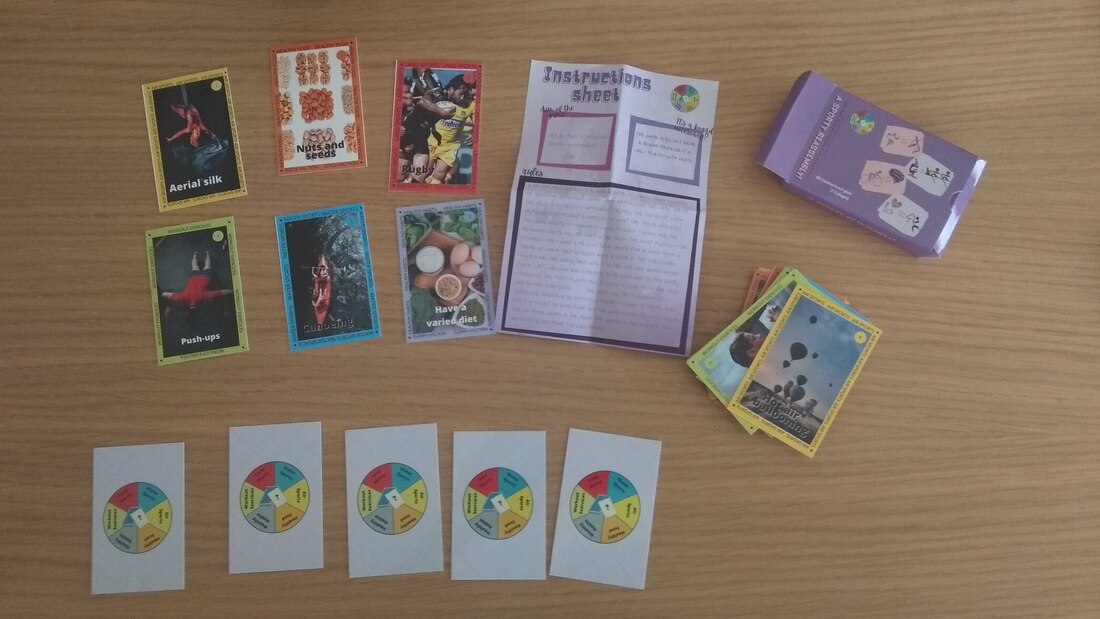
GAME 2. FINAL DESIGN TASKS:
- Box: title, images, logos (Erasmus, SSL, 4 schools)
- Instructions Sheet: text, header (title, logos)
- Cards list: table cards/themes (same style as Instructions sheet, logos)
- 36 Cards: own creation or free-to-use images
The PDF files will be printed out and the game will be finalized.
GROUP 1 Tasks 1-2-3 (design of box and cards list, revision of instructions)
GROUP 3 Task 4: 18 cards (design) Cards 1-2-3
GROUP 4 Task 4: 18 cards in cooperation with Group 2 (design) Cards 4-5-6
All files created have to be stored in the in the corresponding drive folder.
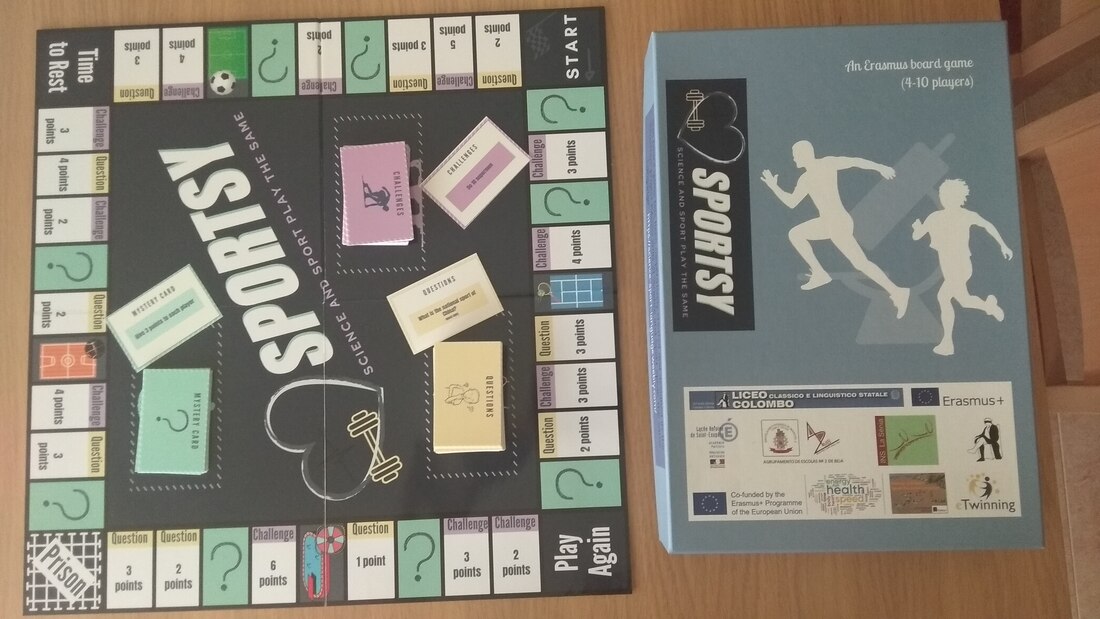
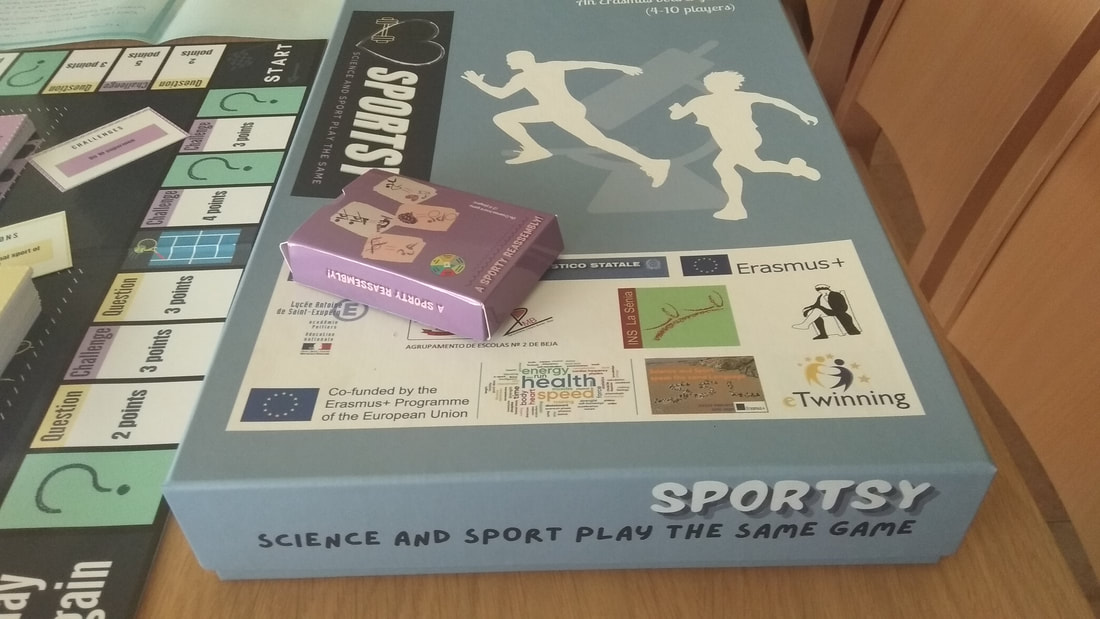
GAME 7. FINAL DESIGN TASKS:
- Box: title, images, logos (Erasmus, SSL, 4 schools)
- Instructions Sheet: text, header (title, logos)
- 72 Cards: 14 Mystery, 34 Questions, 24 Challenges
- Board (same style as Instructions sheet, logos)
- 10 Pieces
The PDF files will be printed out and the game will be finalized.
GROUP 5 Tasks 1-2 (design of box, revision of instructions)
GROUP 6 Task 3-4 (design of board, revision of cards, create more questions)
GROUP 8 Task 5 (design and 3D printing) The printing task is done in La Sénia
All files created have to be stored in the corresponding drive folder.
7. Cooperative preparation of the game. All the groups (except the winning ones) and the teachers arrange the tasks to be done using Google Drive or other tools. They have to design all parts of it before manufacturing (card board printing, pieces 3D printing, box printing .... etc). The pupils and teachers communicate by email to advance their tasks.
Links to the Drive folders that contain the final PDF files sent to the printing company.
Game 2
Game 7
And the 3D Printing files to create the pieces for Game 7 (SVG files used and the STL files prepared with TINKERCAD).
3D Printing Pieces
8. The game is ready to be played with.
9. Congratulations to everybody!!!